Welcome, Guest!
My goal is to give pleasure to you and your Sims.
I hope all will be satisfied. Enjoy! :)
| show all |

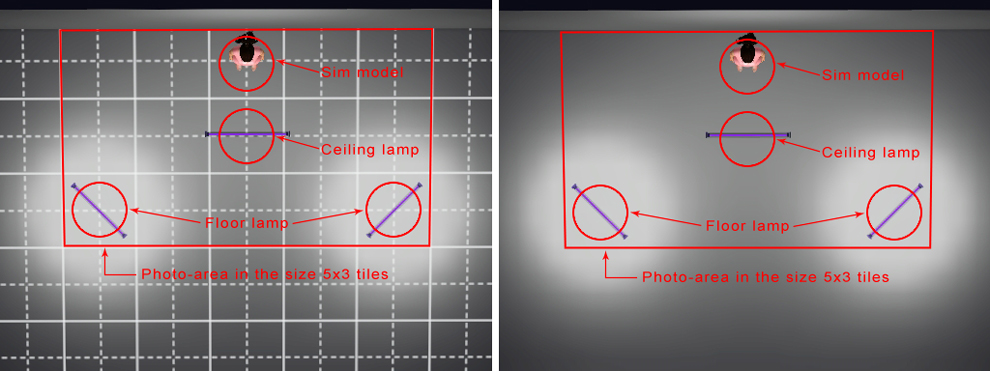
As you know, the success of a good sreenshot - put right light. Low quality screenshot can not only not shows all the advantages of creation, but can even spoil the impression of the work done. And I think that many novice creators need this little manual. I call your attention to the scheme, which I always use when shooting my models. Maybe it's not perfect, but in any case, can serve as a starting point and then you can experiment.
So, let's begin. The basis for our photo-area will serve as a "rectangle" in the size 5x3 tiles. Model (SIM) is placed in a center of the top row of tiles. —eiling lamp set in the center of the middle row of tiles. Also, floor lamps set in the corners of the bottom row tiles.
Important: all lamps turn on the mode of "a dim light". Ceiling lights in different designs provide different lighting, so try to change them in order to achieve the best option. Most of all I like to use a ceiling lamp by Dot.
Room for shooting has no windows and do not forget to put a roof. If you want to take a picture of a sim on the background of nature, then build a room in the right place and lower wall before shooting.

1. Download and install the following mods in the directory My Documents/Electronic Arts/The Sims 3/Mods/Packages:
- NRaas_MasterController_V119
- NRaas_MasterControllerCheats_V117
Also do not forget about the file Resource.cfg, that is to be placed in the directory My Documents/Electronic Arts/The Sims 3/Mods.
2. If your sim is already a mermaid, then skip this step. Click on your sim, select from the menu "NRAAS", then select in the windows that will be opened: "Intermediate" → "Occult: Add" → "Mermaid".
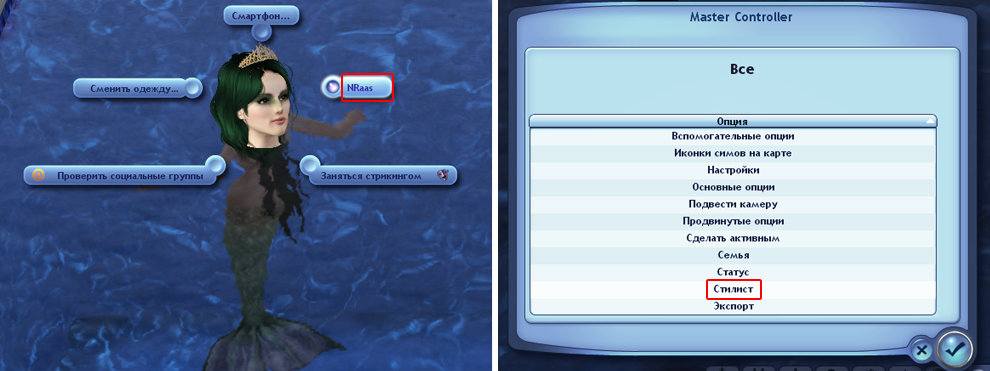
3. When your sim-mermaid will be in the water, and will have a tail, click on your sim, select from the menu "NRAAS" (pic.1), then select the option "Stylist" (pic.2). Stylist room will be opened, tails are in the "bottoms".


